

If you have a passion for something so strong that you can't help but share it with the world, starting a YouTube channel might be the right place to begin. But what if you’re camera-shy, you don’t like the sound of your voice, or simply don’t want to show your face? There’s a workaround. In 2024, there are things that can be done entirely (or, well, almost entirely) with the help of AI, so a YouTube channel is not an exception. You can create the so-called faceless channel and still share what you want to share without showing your face and revealing your voice.
That’s what we’re about to cover.
What Is a Faceless Channel?
It means that the creator (you) opts not to appear on camera. Instead, they rely on voice-overs, animations, screen recordings, slideshows, or text to convey their content. Some creators remain completely anonymous, using a pseudonym or an avatar instead of showing their real identity.
Benefits of a Faceless YouTube Channel
-
Your privacy is safe.
-
No stress because of being on camera.
-
You focus on content, not how you look and what to wear.
How to Start a Faceless YouTube Channel
Throughout this article, we’ll show you videos of the channels that fall under the faceless category, so you can visit them on YouTube and checl how large followership they have. (Spoiler: big!) So there’s definitely a niche for such faceless content in 2024 which you can benefit from and monetize.
Step #1. Choose Your Niche
We’d recommend to think what you’d like to talk about, what you’re passionate about in your channel, not blindly follow the trends.
Here are some ideas you can use to build a successful faceless channel around:
-
Motivational clips
-
Top lists
-
Cooking guides
-
How-to tutorials
-
DIY projects
-
Gaming content
-
Language lessons
-
Study music
-
Bedtime stories
-
Science experiments
-
Ambient sounds
-
Educational videos on any topic you’re expert in
Step #2. Create an Account and Plan Out Your Content
Once you’ve settled on your niche, it’s time to get your YouTube channel up and running.
-
Sign up for a Google Account if you haven’t already.
-
Log in to YouTube with your Google Account on a computer.
-
Click on your profile picture, then select Settings.
-
Click on Add or manage your channel(s).
-
Click on Create a channel.
-
Review the details, which will include your Google Account name and photo.
-
Confirm.
Your channel’s name, logo, and banner are your first impressions, so make them memorable and visually appealing.
Step #3. Plan Your Content Strategy
Use tools like Google Trends, Ahrefs, or TubeRanker to find trending topics and analyze your competition. The best working stattegy would be balancing popular trends with your genuine interests. Then, you can map out a publishing schedule. The YouTube algorithm favors channels that post regularly, so aim for weekly uploads for longer videos and daily uploads for shorter content.
AI tools like ChatGPT can help generate content (like video topic ideas and even scripts) based on your input and research. All you need to do is provide detailed guidance to ensure the output matches your style and goals.
Step #4. Make a Faceless Video
Record Your Voice
All you need here is a microphone and voice-recording software. For the latter, consider Waveroom, which offers features like AI-powered background noise removal and automatic gap removal.
Follow these steps to record a high-quality voice-over for a video:
-
Find a quiet place before the recording to avoid any background noise and ambient sounds.
-
Log in or sign up to your Waveroom account.
-
Click the Create a Room button (+ in the top left corner). The room will be your virtual recording studio.
-
Connect a microphone to your computer. It will help you get top-notch quality results. We recommend you use a USB or XLR microphone; an in-built mic might not be enough to provide optimal sound quality.

-
If you previously recorded with Waveroom, click + at the top left corner to create a new recording room. If you’re a new user, skip this step.
-
Head over to the Record tab and disable video recording by toggling it off.
-
(Optional) Enable additional features in the AI tab. Toggle on Remove Noise to cancel out extraneous sounds, Transcribe Speech to convert speech to text, and/or Create Summary to summarize what’s been said during the recording.
-
Click the Start Test Record button to check how you’re going to sound or go right to Start Meeting to start recording.

-
When you’re done, click the Stop button to end the recording session.
Wait a few seconds until the recording is saved. Once you see the Upload Completed notification at the bottom right corner, click the X sign to leave the room.
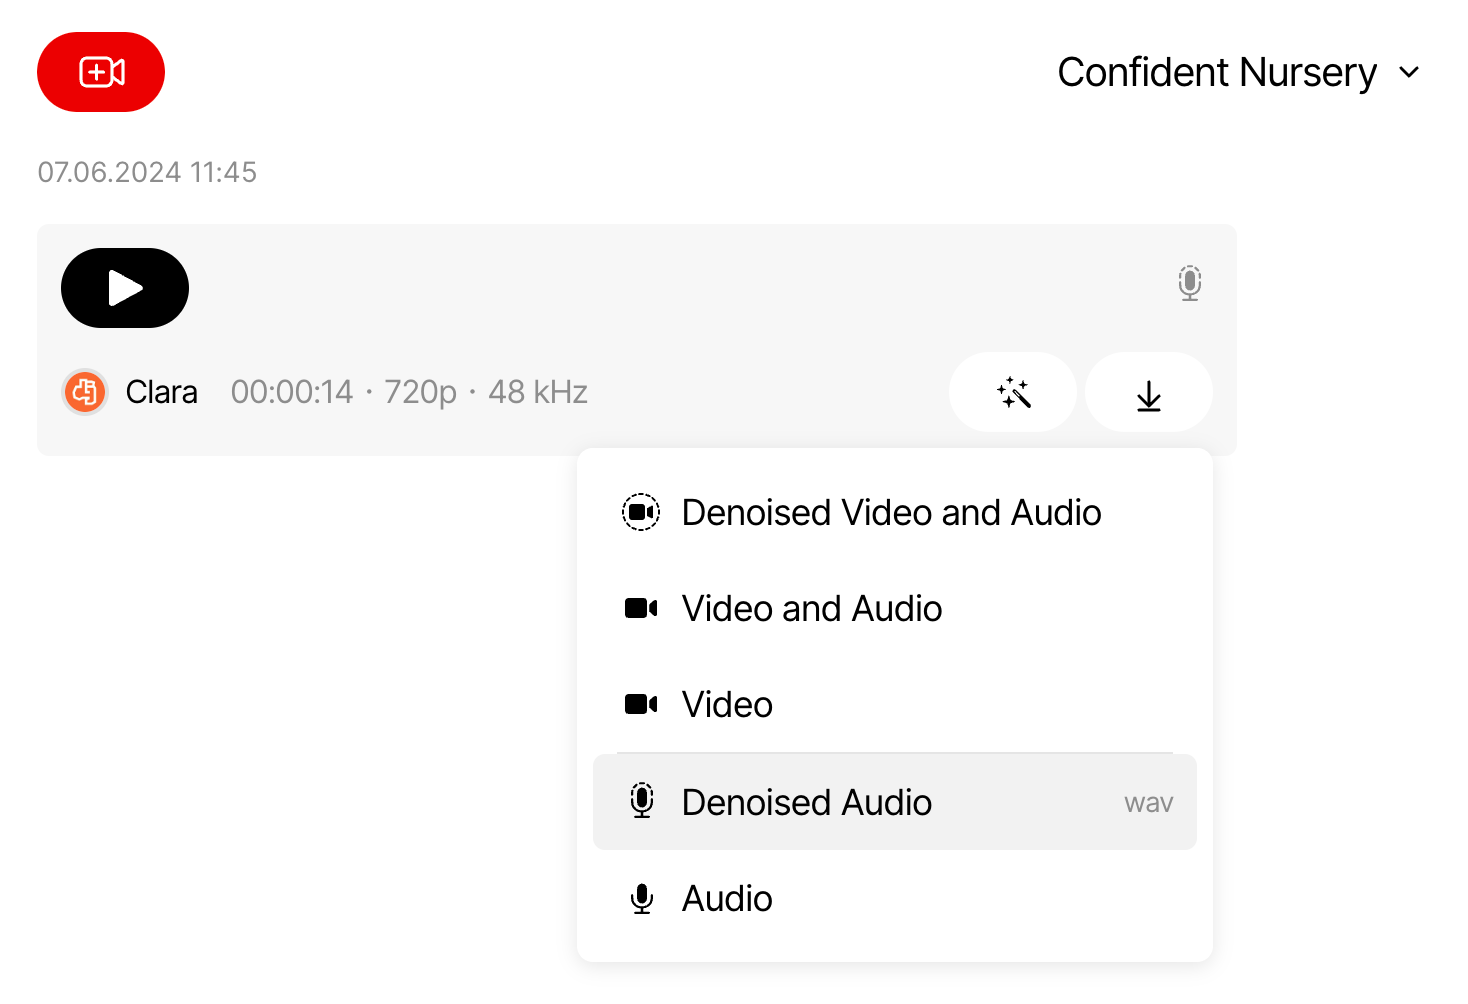
After that, you will be taken to a page with a list of all recordings. Here, you can play and download them.
Tip: You can apply AI features to your recordings if you skipped this step before recording. At the bottom of the page, click Denoise to remove background noise from the audio, click Transcription to transcribe the audio to text, and/or click Summary to create an overview of the key points of your recording.
Optional: Pick a Voice Generator
A good voice-over helps build your brand and engage your audience. Use AI voice-over generators to create professional-quality voice-overs in any language and tone or to simply change your voice for fun.
If you need to change the voice of a singer or even your own to the vocals of a chart-topping star, LALAL.AI Voice Changer is the right tool. It will change any voice to a voice similar to one of the 16 great vocalists. To create it, head over to the tool's website, choose a Voice Pack, and upload your audio or video file.

Then just let LALAL.AI Voice Changer work its magic and download the file with a changed voice.
Edit Your Faceless Video
Such videos typically consist of your voice and some videos and/or images, so editing might not be that complex but take a long time, regardless.
To streamline the process, use professional but user-friendly video editing software like Adobe Premiere, Final Cut Pro X, or iMovie.
Add Some Music (Optional but recommended)
Last but not least is choosing music that fits your video’s theme and tone. You can use royalty-free tracks to avoid copyright issues. The right music can enhance engagement and emotional connection.
Then you just need to upload your video to YouTube and optimize it for YouTube SEO. Here are some tips to do the latter.
SEO Tips
-
Rename your video title using a target keyword.
-
Optimize your video description with relevant keywords.
-
Tag your video with popular keywords related to your topic.
-
Encourage viewers to take action in your video and description.
-
Categorize your video appropriately.
-
Design a unique thumbnail for your video.
-
Use subtitles and closed captions with an SRT file.
-
Add Cards and End Screens to boost engagement.
-
Include hashtags to expand your reach.
-
Create playlists related to your video’s topic.
-
Use timestamps.
-
Post a pinned comment from your account.
Tip: To better promote your video, cut into several YouTube Shorts. We have a dedicated guide on how to do that effortlessly, with the help of AI Video Cut and with no daunting editing.
 SHARE ON TWITTER


Thanks for feedback
Your comments will appear here shortly. Please spread the word about us in social networks.