

Google has found that it takes only 10 seconds of loading time to increase a site’s bounce rate by 123%. When images don’t load quickly, it affects the entire website’s performance and might make visitors go elsewhere. But the common issue with image optimization is that when you reduce its size, you reduce its quality as well.
In this post, however, we’ll share some tips that’ll allow you to optimize images for the web without damaging their quality. At the end of the day, optimized images boost SEO of your website, make it and its pages load faster, thus keeping the visitor scroll it further instead of jumping to a competitor’s site.
What Is Image Optimization?
Optimization of an image means you reduce its size by either compressing it in a special tool or changing its proportions. Apart from that, image optimization might involve delivering images in a format, dimensions, resolution, and quality that yield the smallest file size while ensuring the image is suitable for the content, page design, device, and user expectations. It includes modifying image format, dimensions, and resolution to balance quality and speed, crucial for web performance and user experience.
How to Optimize Images for Web & Site Performance
Image optimization is always about the balance between the quality of an image and the lowest possible file size. You can optimize an image before you upload it to your website in a special tool or plugin (we’ll talk about them below). Now, let’s take a look at image optimization ways that’ll ensure you keep this quality-file size balance.
Start with High-Quality Images
The simplest way to optimize your website performance is to choose images that already have flawless quality. Stock photography sites like Unsplash, Pixabay, PicJumbo, and others can ensure that. The only issue here is that these images might be super big and you’ll still need to reduce their size. To reduce it, you can use tools like Photoshop, Pixelmator Pro, or alternatives.
Choose the Right File Format
Another option is to select the file format that provides the best quality and file size balance. These are the most common types of files you can use:
JPEG
-
Compression: JPEG offers high compression rates, suitable for continuous-tone images like photographs, but higher compression levels may affect image quality.
-
Image type: Ideal for photographs with subtle color variations and details.
-
Compatibility: Supported by almost all browsers and devices, making it versatile for web use.
PNG
-
Transparency: PNG supports alpha channel transparency, making it suitable for graphics, logos, and images requiring transparency.
-
Lossless Compression: Preserves image quality but results in larger file sizes compared to JPEG.
WebP
-
Compression: Supports both lossy and lossless compression, transparency, and animations, providing significant file size reductions compared to formats like PNG and JPEG without compromising quality.
-
Lossless compression: Lossless WebP images are 26% smaller than PNGs, while lossy WebP images are 25-34% smaller than equivalent JPEGs at similar quality levels.
-
Compatibility: The format is supported by major browsers like Google Chrome, Safari, Firefox, Edge, and Opera, as well as various image editing tools, making it increasingly popular for web use.
HEIC
-
Compression: The format offers superior compression capabilities compared to traditional formats like JPEG and PNG. HEIC files are encoded using HEVC (High Efficiency Video Coding), allowing for high-quality images with smaller file sizes, making them ideal for efficient storage and transmission of images on devices like iPhones and iPads.
-
Conversion: HEIC files can be converted to more widely supported formats like JPEG or PNG using various online converters or software tools, enabling users to view and use these images across different platforms and applications.
Mind the Difference Between Lossy vs. Lossless Compression
To put it briefly, lossy compression prioritizes file size reduction over quality, while lossless compression maintains image quality at the expense of larger file sizes. Here’s a more detailed explanation.
Lossy Compression
-
Permanently removes some image data considered less important to reduce file size
-
Reduces image quality, but the loss is often undetectable to the human eye
-
Provides higher compression ratios and significantly smaller file sizes
-
Commonly used formats: JPEG, WebP
Lossless Compression
-
Compresses images without removing any data, preserving quality
-
Reduces file size by stripping metadata and non-essential information
-
Allows images to be compressed and decompressed multiple times without quality loss
-
Provides smaller file size reductions compared to lossy compression
-
Commonly used formats: PNG, GIF, TIFF
The choice between lossy and lossless compression depends on the specific needs of the image and the website. Lossy compression is ideal for photographs and images where some quality loss is acceptable in exchange for much smaller file sizes and faster load times. Lossless compression, on the other hand, is better for images with text, transparency, or where quality is critical, such as for product images or photography showcases.
Use Image Optimization Tools, Desktop & Online
There are many solutions you can choose to reduce an image size and optimize it for the web, be it a lossless or lossy compression. Here are some of them.
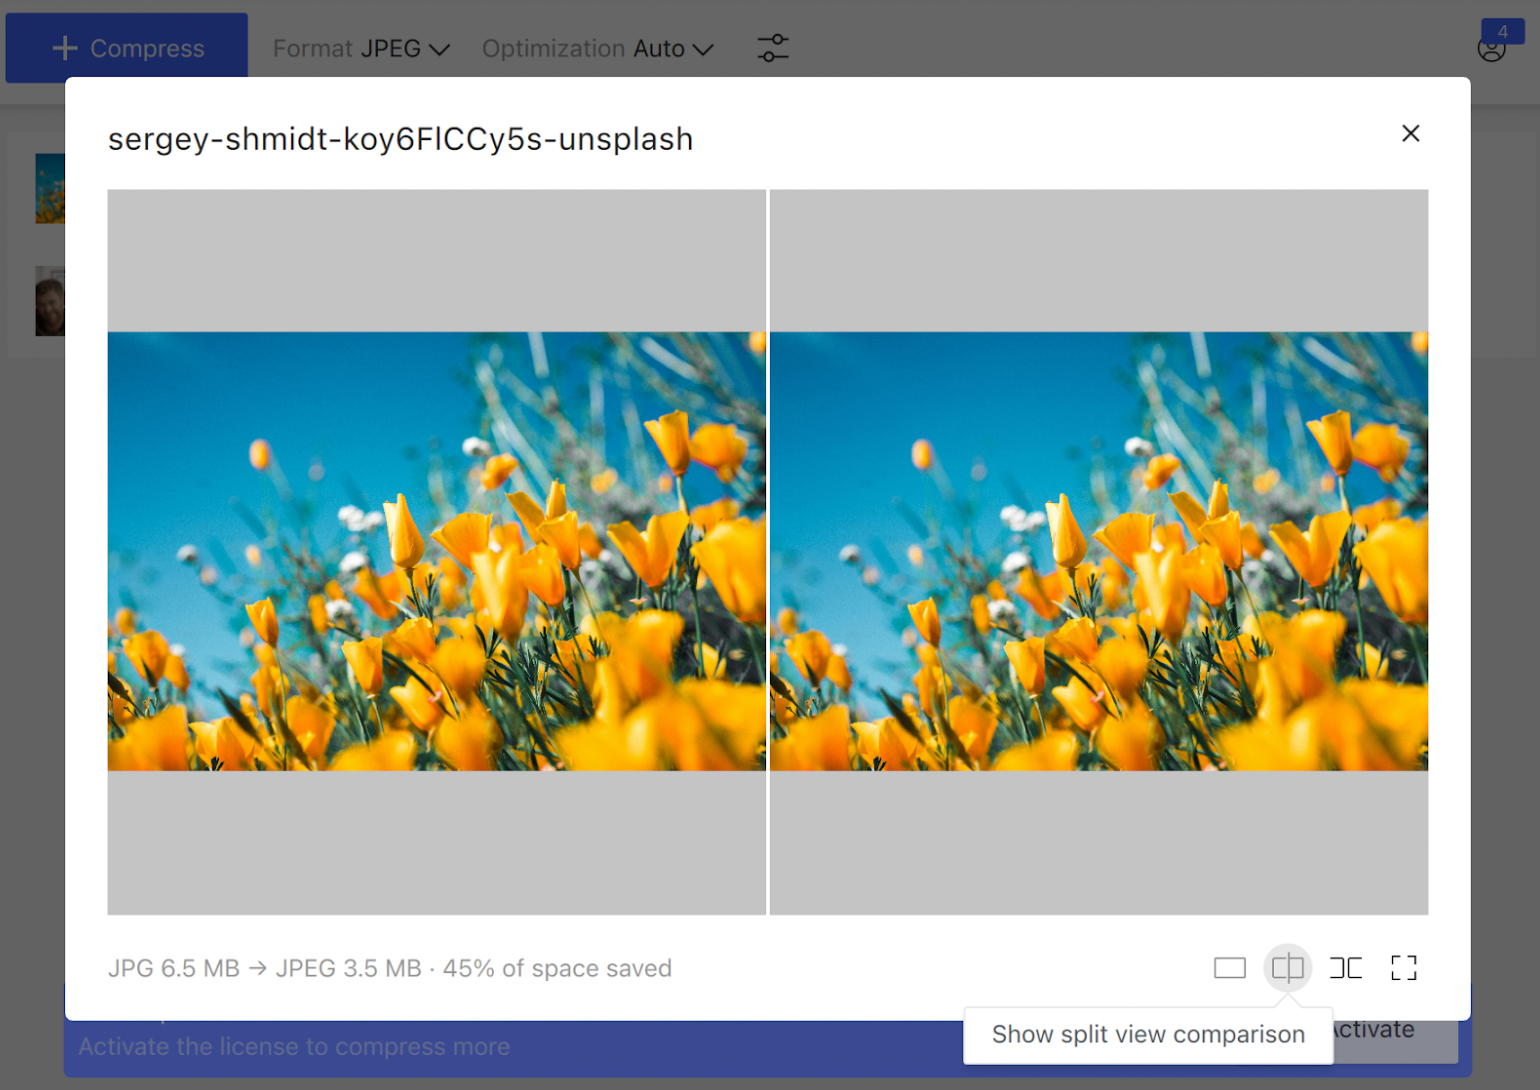
4K Image Compressor

4K Image Compressor is a desktop application compatible with macOS, Windows, and Ubuntu. It can easily and quickly optimize JPEG, PNG, HEIC, and WEBP images as well as PDF files. Besides, all file formats (except PDF) can be converted to other formats, supported by the app. In addition to compressing single images one by one, the tool can also optimize images in bulk, saving both storage space and your time.
Here’s how to compress an image with this application:
1. Launch 4K Image Compressor. It’s available for Windows, macOS, and Linux.
2. Select the output format and value in the settings bar.

3. If you selected the Percent value, enter the number of percents you want to compress the file by. If you selected the Size value, enter the number and unit (B, KB, MB).
4. Click the Compress button located in the middle of the application window.
5. In the opened window, select the image for compression and click Open.
Your image will be immediately uploaded and compressed.
Hover the cursor over the compressed image preview and click the folder icon to find the file on your computer.

If you prefer native ways that your mac provides, here you go.
Reduce a File Size in Photoshop
Compressing an image in Photoshop is a bit more complicated, but if you’re an avid Photoshop user and generally tech-savvy, you can try this method as well. To reduce the file size of a PNG in Photoshop, follow these steps:
-
Open the PNG file in Adobe Photoshop by dragging and dropping the image into the application or using File -> Open.
-
Navigate to Image -> Image Size or press Ctrl+Alt+I.
-
In the Image Size Dialog box, decrease the Height/Width of the image to compress its size. Ensure that the option to constrain proportions is selected.
-
Click on the Resample button and choose Bicubic Sharper from the list to maintain image sharpness during compression.
-
Click OK to close the Image Size dialog box and save the compressed image.
If you’re looking for an analogue for Mac, you can use Pixelmator Pro. It works similarly to Photoshop but is a bit easier to use.
Compress an Image Online with Compressor.io
In addition to desktop third-party software, there are plenty of online solutions that can be just as helpful. Compressor.io is one of them. It supports various image formats, including PNG. It uses different compression algorithms to reduce file sizes. Users can upload images, compress them, and download the optimized files.

Here are the steps for compressing a PNG image using Compressor.io:
-
Go to the Compressor.io website by typing "compressor.io" in your web browser.
-
Click on the "Select files" button or drag and drop your PNG file directly onto the webpage.
Compressor.io may offer some optional settings depending on the file type. For PNG files, it typically provides options for lossless and lossy compression. You can choose your preferred compression level based on your quality requirements.
-
After uploading the PNG file and adjusting settings (if necessary), click on the "Apply Compression" or similar button to start the compression process.
Compressor.io will process the image, and you'll see a progress indicator. The time required for compression depends on the file size and your internet connection speed.
-
Once the compression is complete, a download link or button will appear. Click on it to download the compressed PNG file to your computer.
-
Save the compressed PNG file to your preferred location on your computer.
Compressor.io makes the optimisation process user-friendly with a simple interface. Just follow these steps, and you'll be able to reduce the size of your PNG images while maintaining a satisfactory level of quality.
Tip: You can find more tools in our article on the best image compression tools.
Use Wordpress Compression Plugins
If you host your site with Wordpress, you don't have to handle all the formatting or compression manually. You can use plugins that will automatically optimize your image files upon upload and even optimize images you've already uploaded. Here are some of the best plugins to enhance your images for better performance:
-
Imagify Image Optimizer
-
Optimole
-
Optimus Image Optimizer
-
WP Smush
-
TinyPNG (also compresses JPGs)
-
ImageRecycle
-
EWWW Image Optimizer
However, it's important not to rely solely on these plugins. For instance, you shouldn't upload 2 MB images to your WordPress media library, as this can quickly consume your web host’s disk space. The best approach is to quickly resize the image in a photo editing tool beforehand, then upload it and use one of these plugins for further reduction.
Note that before choosing one of these tools or plugins, check if your web host provider offers built-in tools for image optimization. This can save you time and ensure optimal performance.
 SHARE ON TWITTER


Thanks for feedback
Your comments will appear here shortly. Please spread the word about us in social networks.