Various situations may call to rotating a YouTube video. One of the prime examples is a YouTube creator shooting a vlog from a smartphone, uploading it to YouTube and having to change the vertical orientation of the video to horizontal so it’s easier for his viewers to enjoy.
Unfortunately, after the changes YouTube introduced in 2017, the video rotation setting is no longer available. YouTube users must edit the orientation before uploading the video now.
If you are that YouTube creator or just a regular visitor of YouTube, Facebook, Instagram, Vimeo and Dailymotion in need to rotate video from these sites, look no further! The steps below will help you rotating the videos you want.
Getting the video to your computer
1. Launch 4K Video Downloader Plus. It’s available for all desktop platforms and Android.
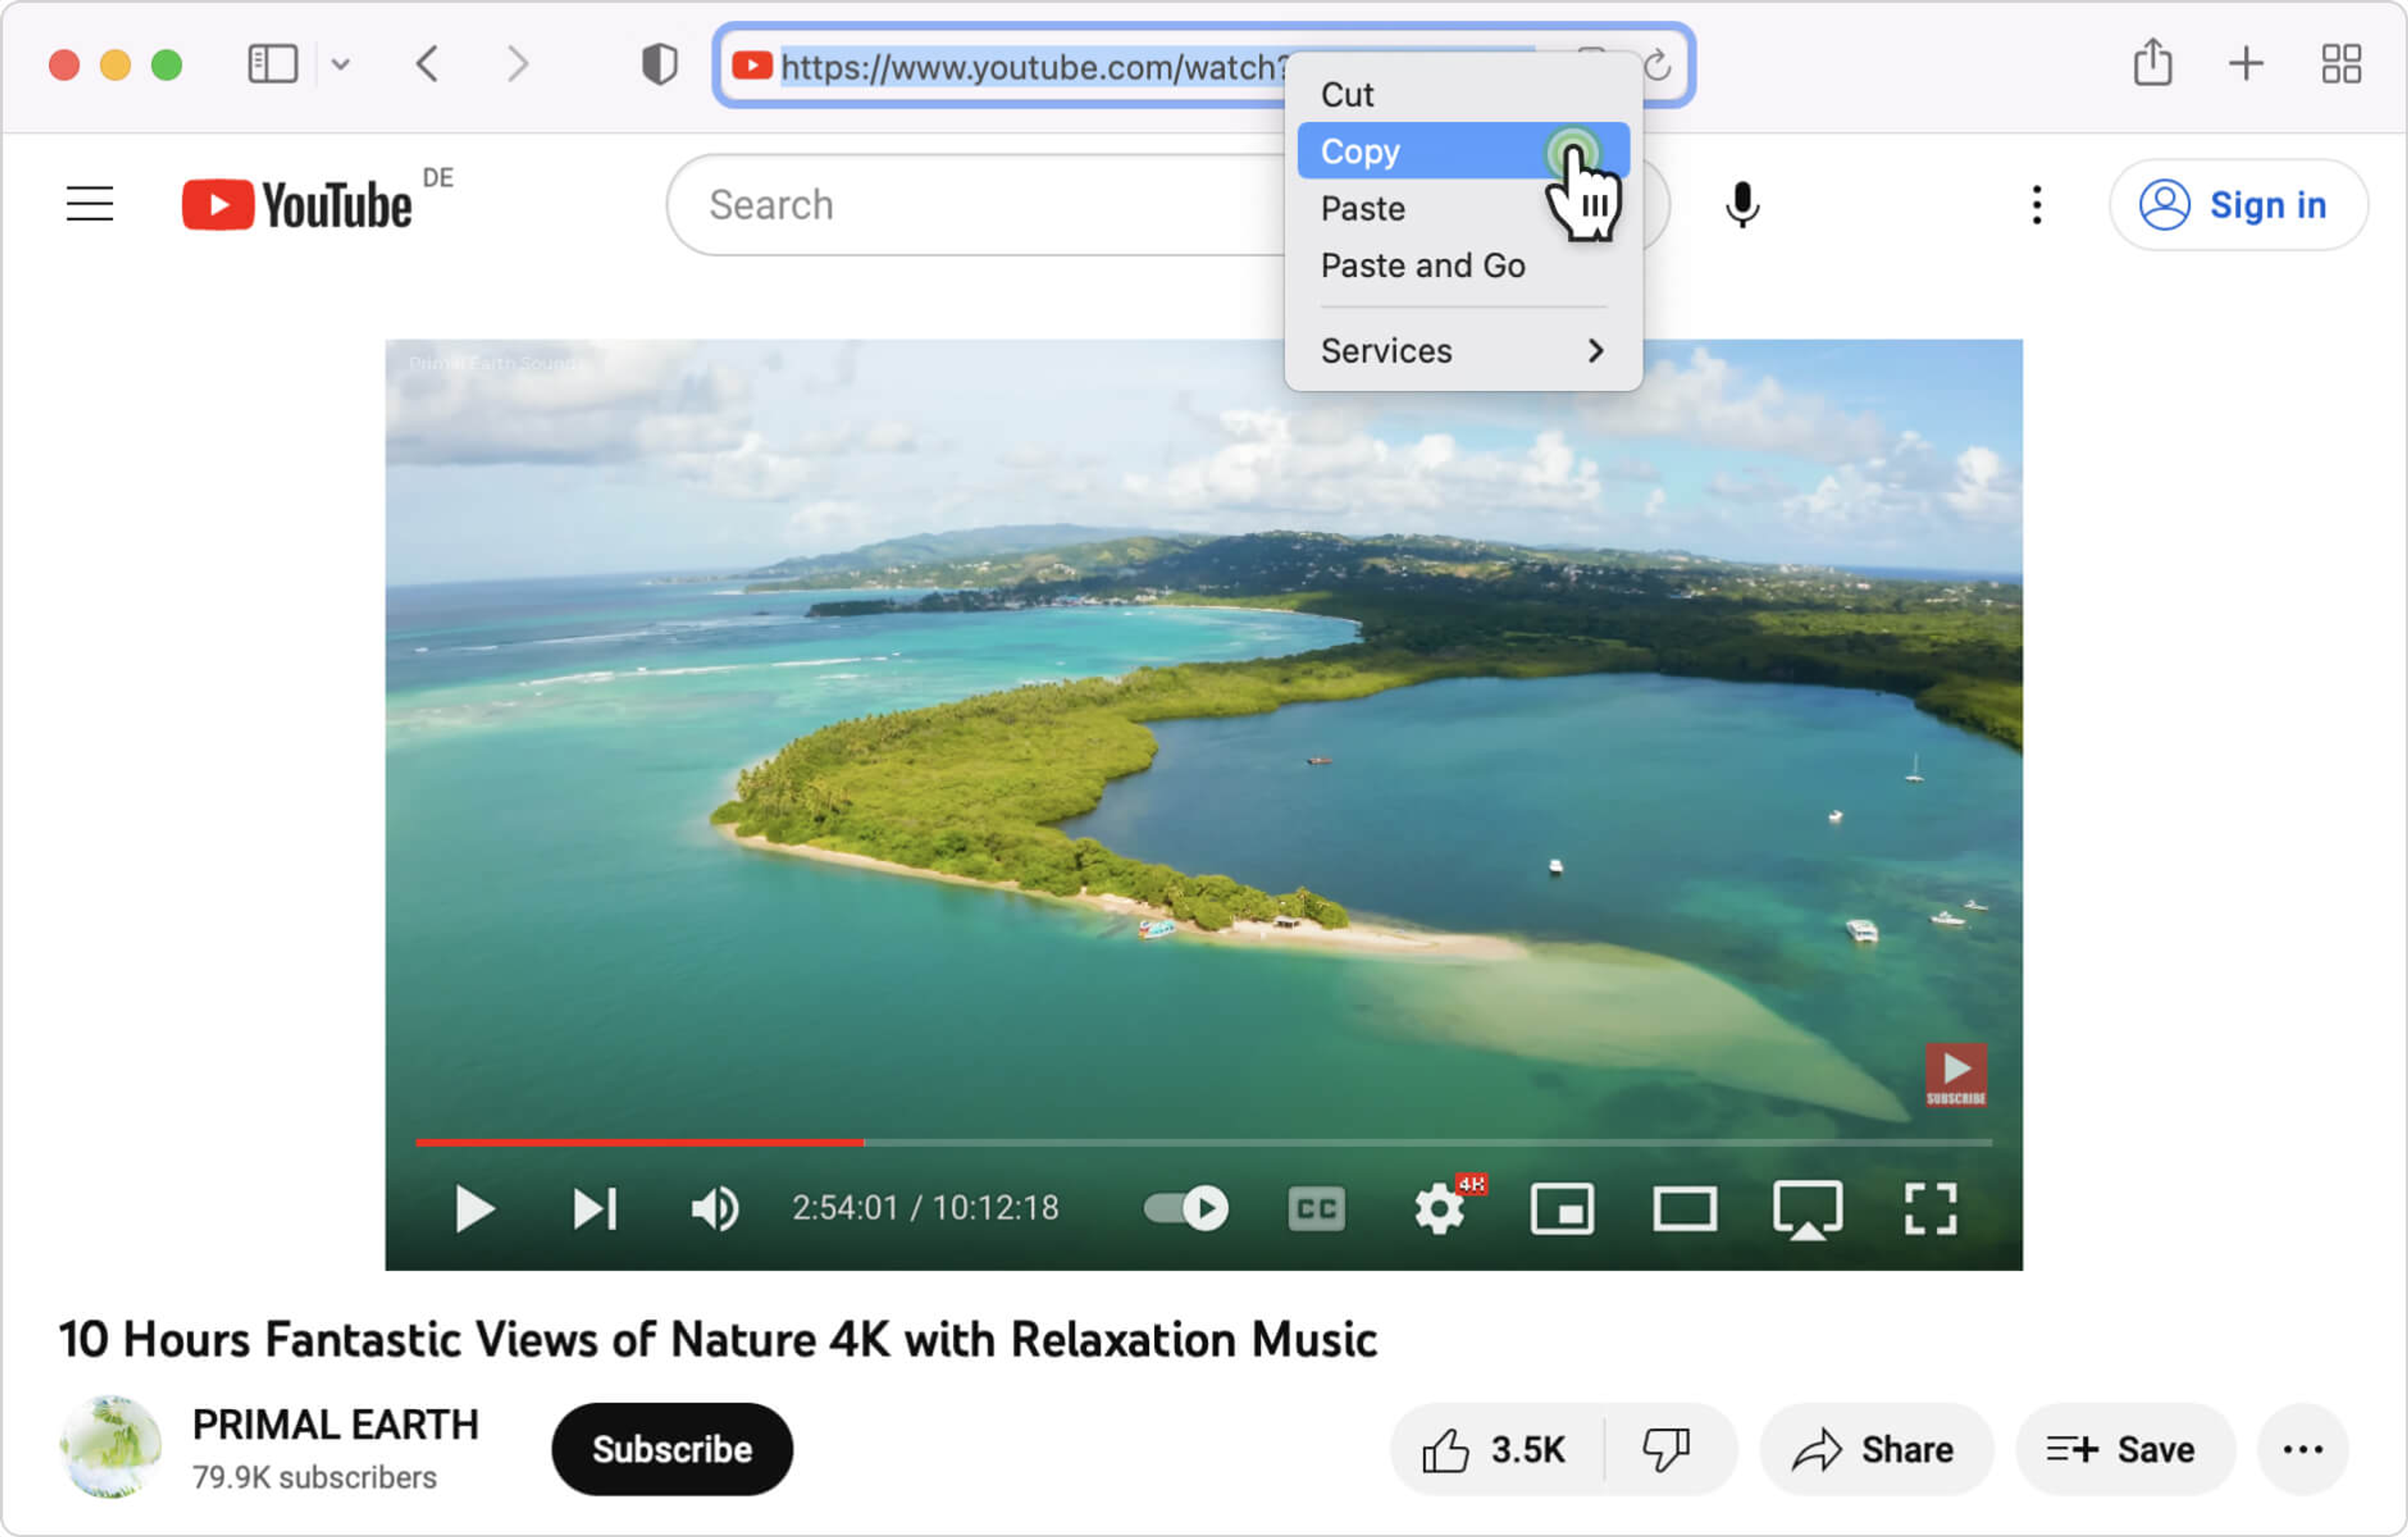
2. Copy the video link from the browser.

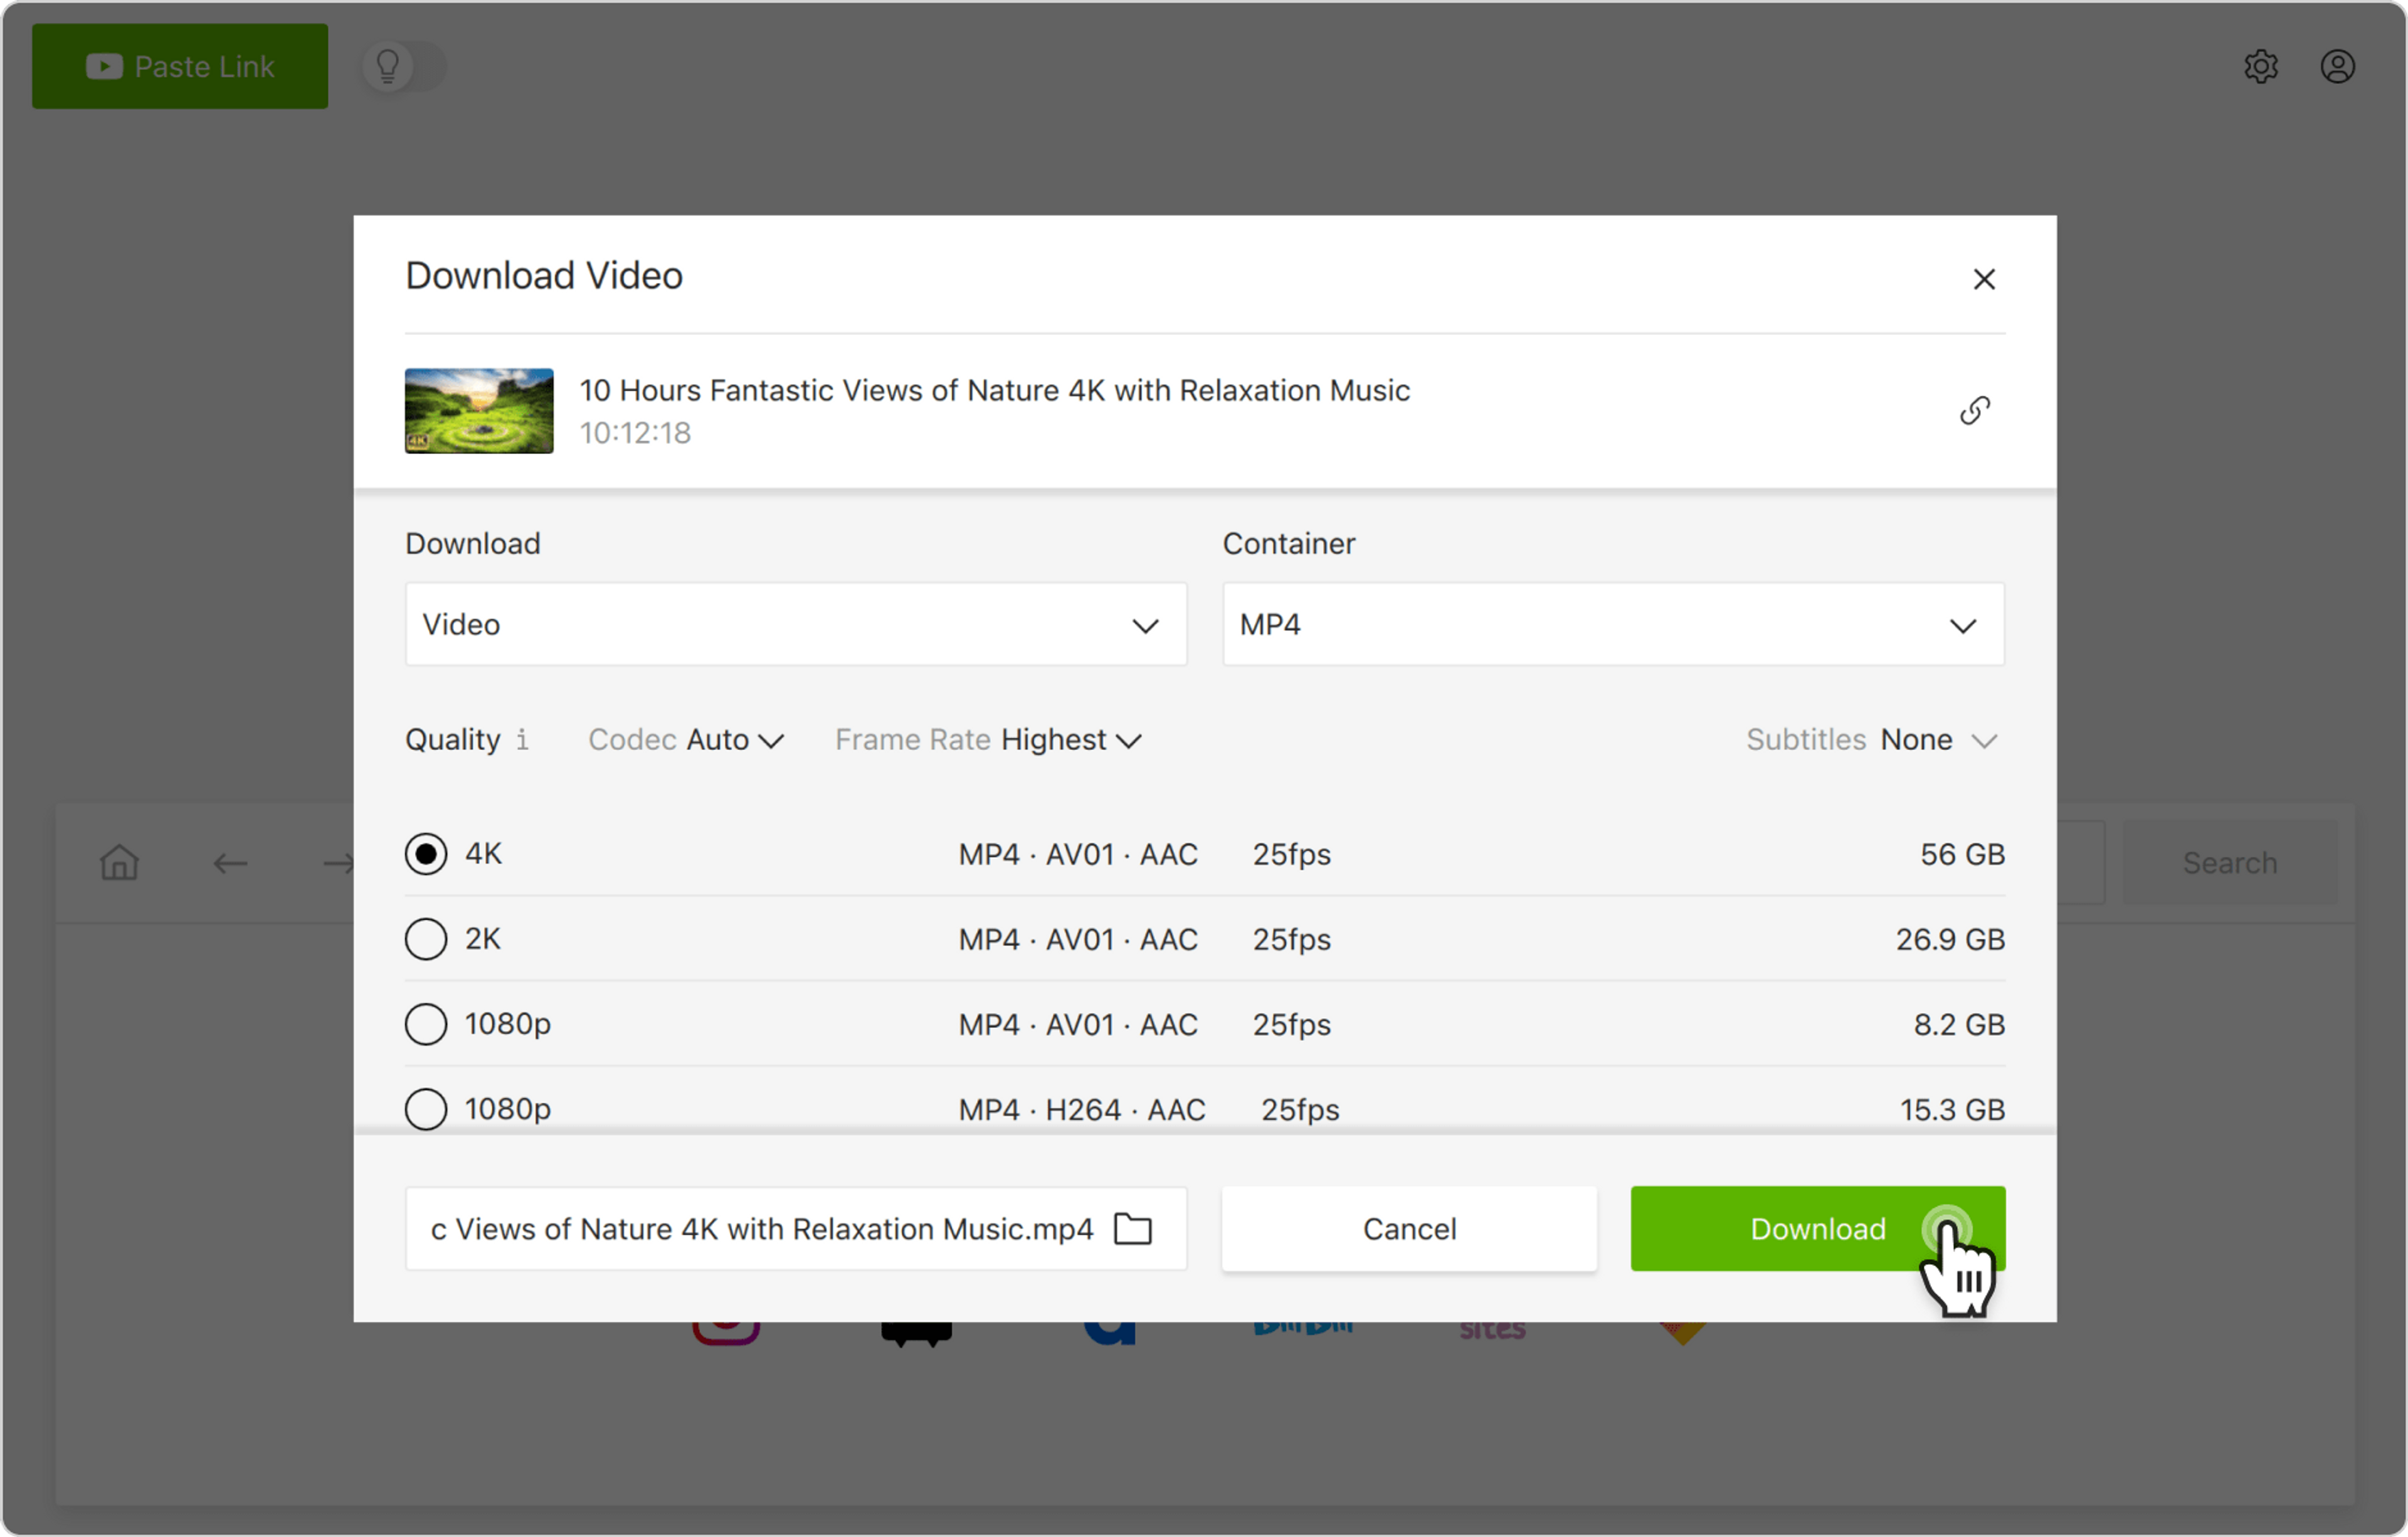
3. Press Paste Url button in 4K Video Downloader application.

4. Select a quality type in the download window and press Download button.

5. Wait a few moments until the downloading is finished.
Rotating the video
Windows
While trusted and versatile media players such as VLC and MPC can rotate videos, the first cuts off the sound after rotation and the latter doesn’t even allow saving an edited copy. Windows Movie Maker remains the best and the most user-friendly option for the task.
1. Download Windows Movie Maker. Launch it after installation.
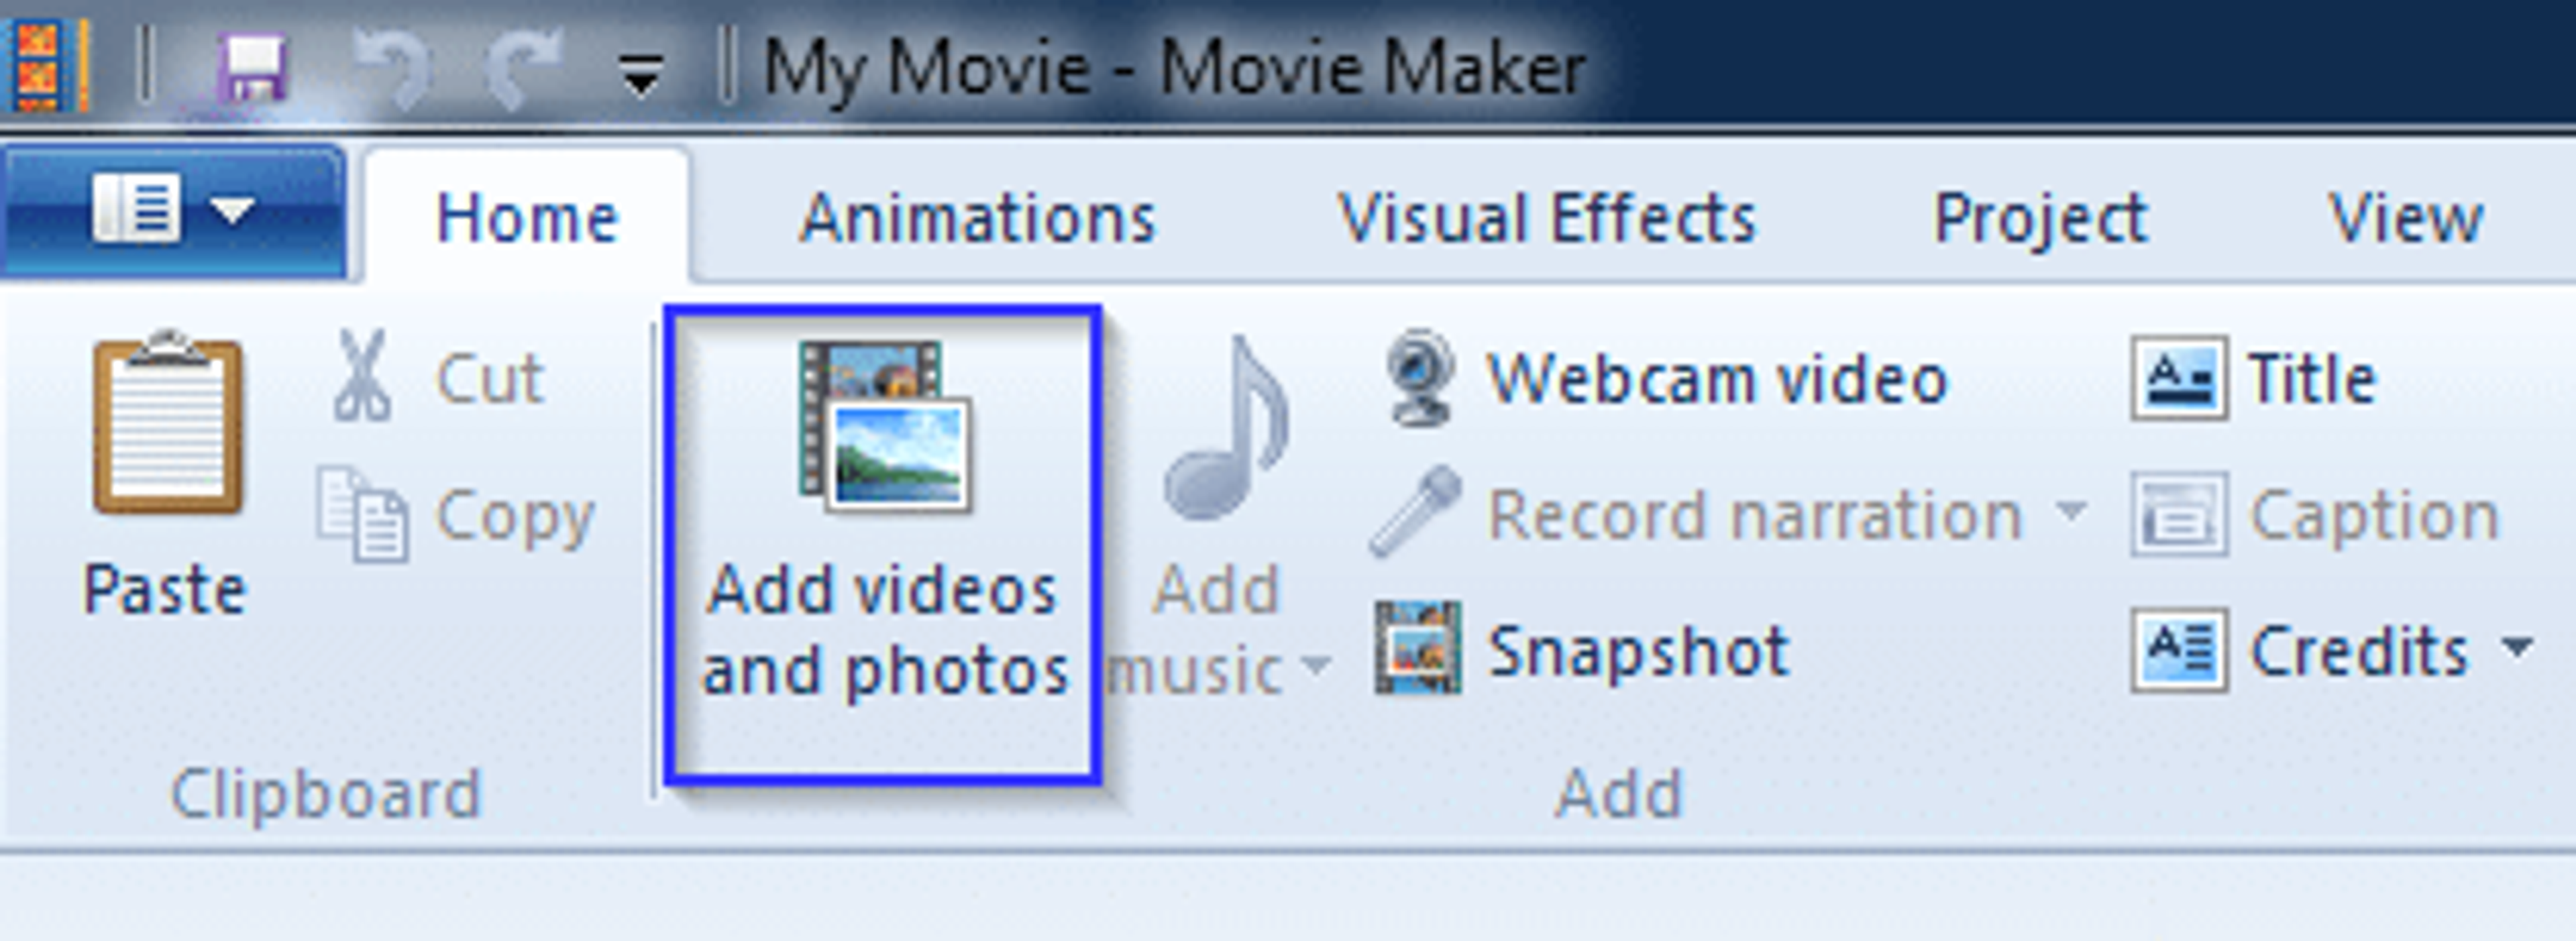
2. Click Add videos and photos in the upper-left side of the application’s toolbar.

3. Select the video from your hard drive.
4. Click Rotate left or Rotate right in the "Editing" section of the toolbar to move the video image accordingly.

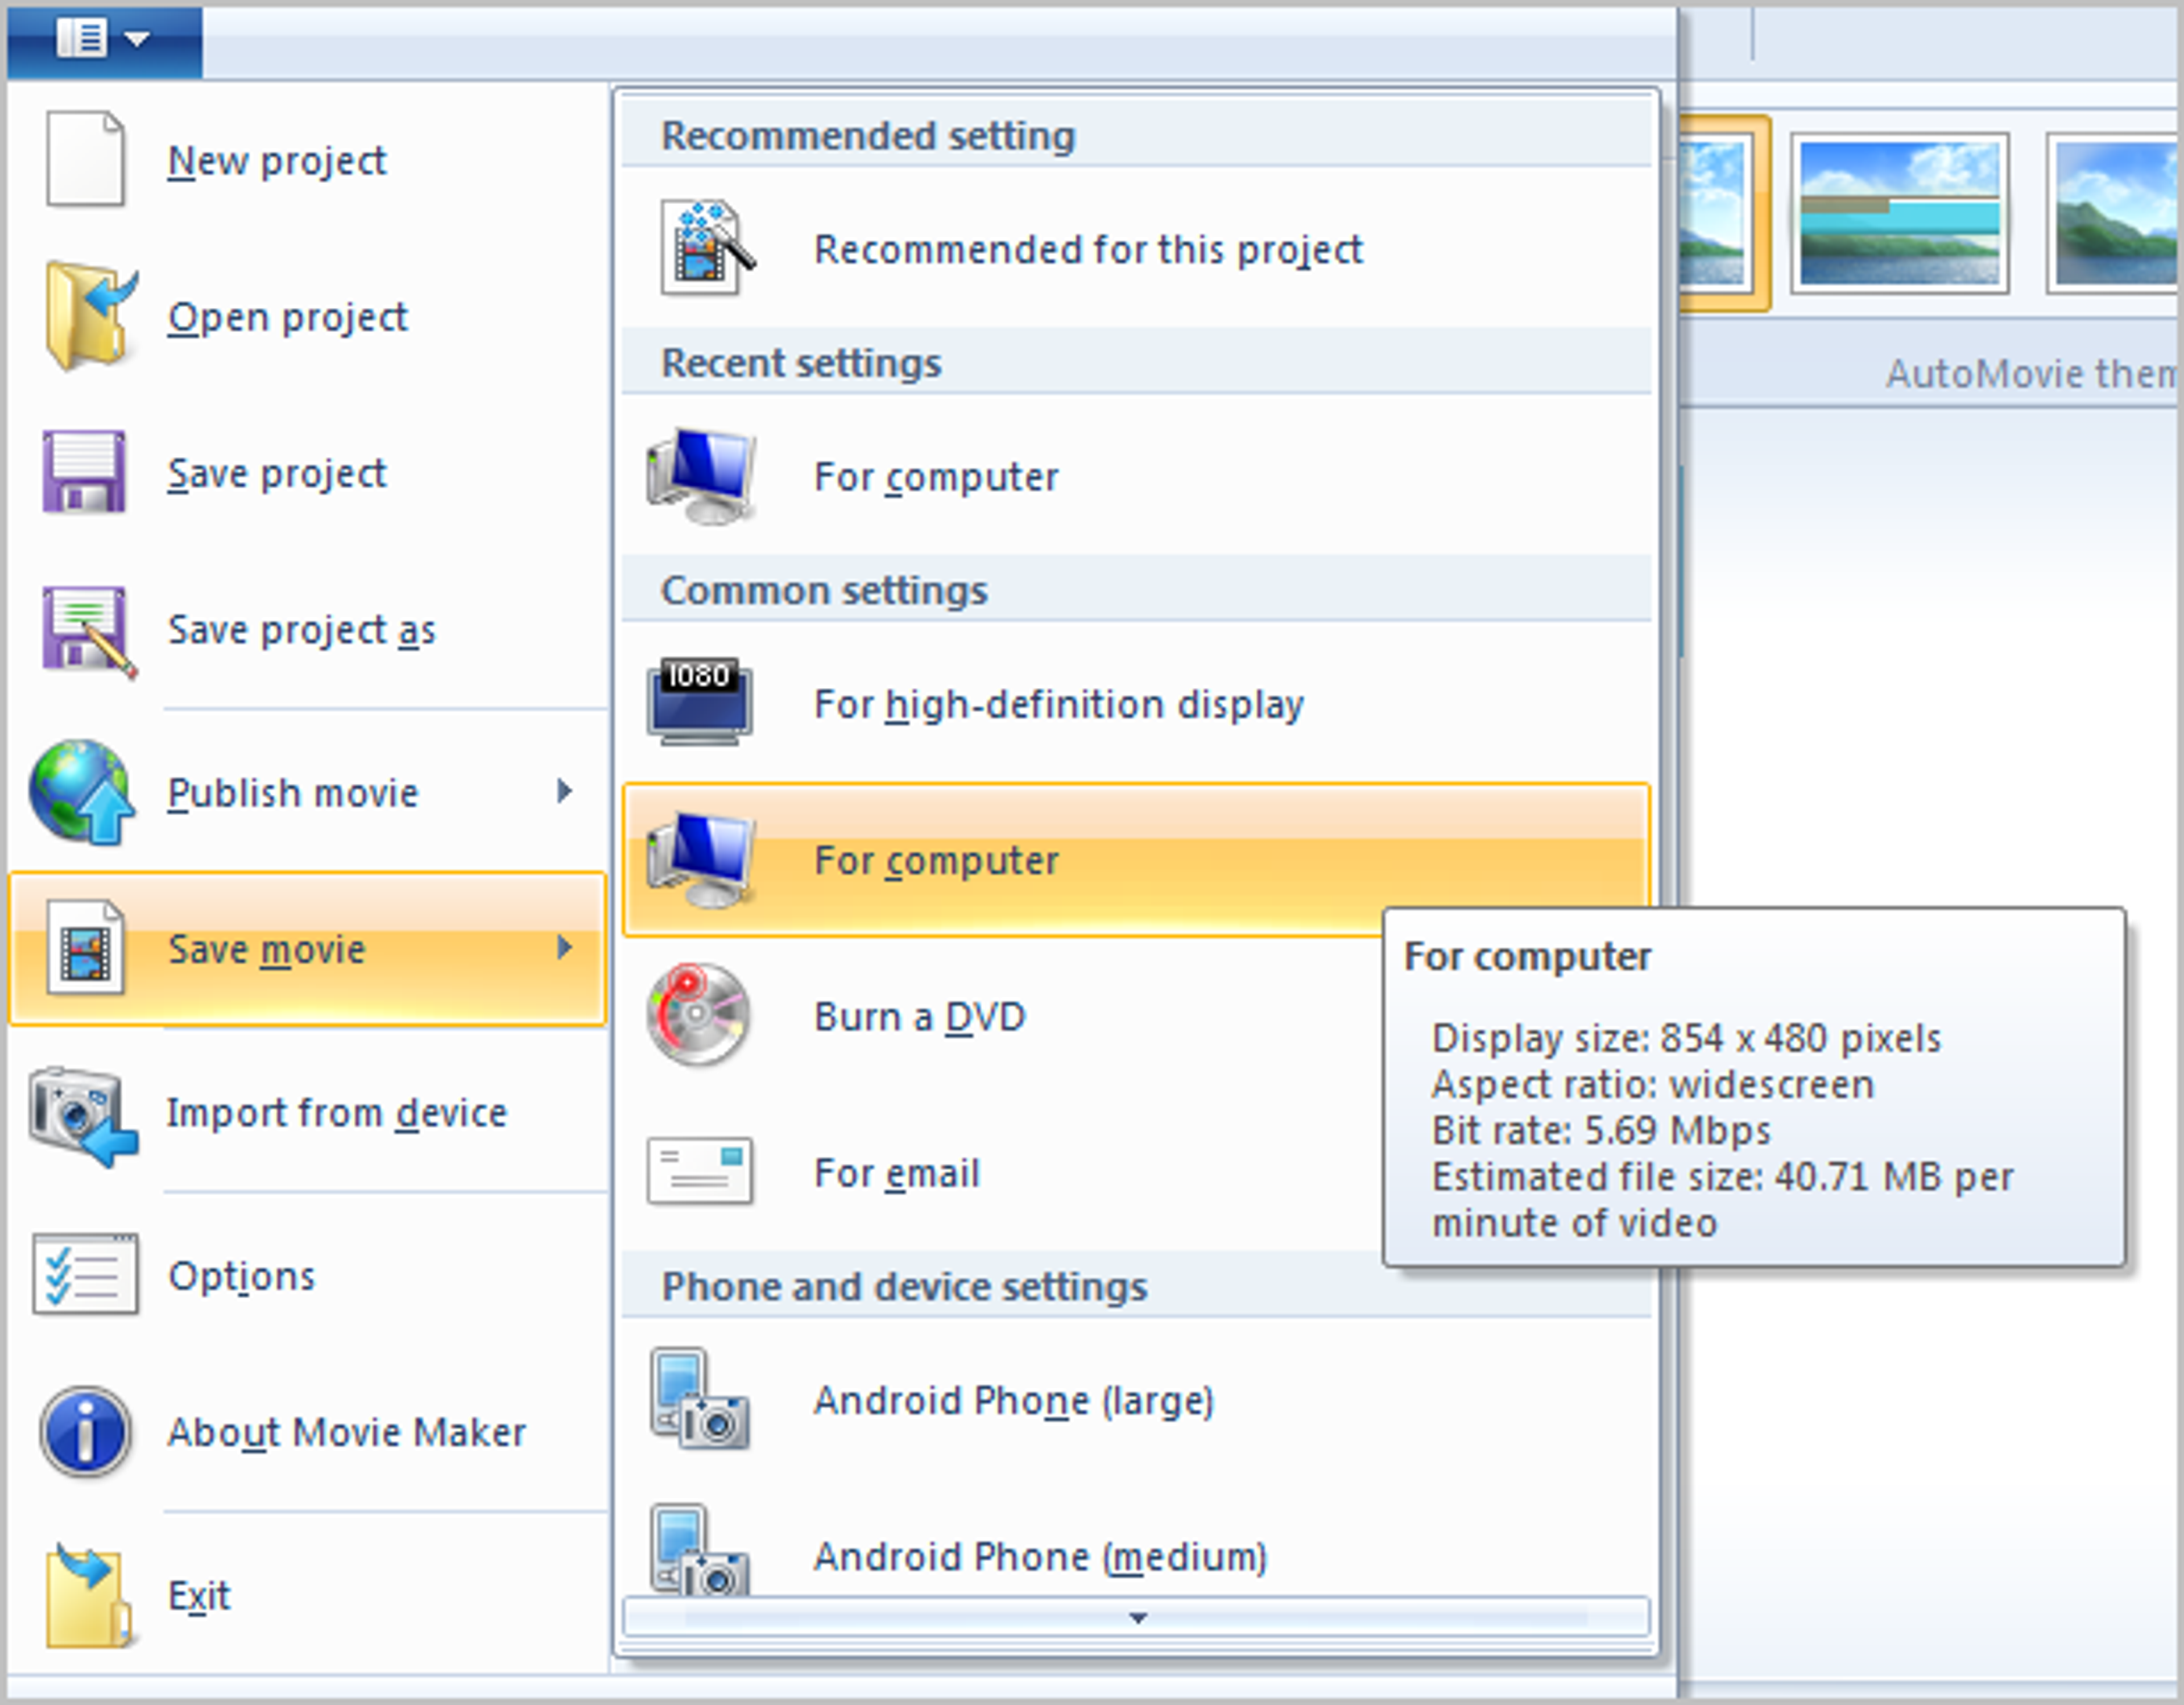
5. Click the file icon > Save movie > For computer to save the rotated version of the video.

Mac
1. Download and install QuickTime Player.
2. Click File menu item at the player’s toolbar, select Open File…, then find and select the video you’d like to rotate.
3. After opening the video, click Edit in the toolbar of the player.
A drop-down menu will open where you may select such options as "Rotate Left"(↑⌘L), "Rotate Right"(↑⌘R), "Flip Horizontal"(↑⌘H) and "Flip Vertical"(↑⌘V).
Click the options or use keyboard shortcuts to rotate the video until you get the needed result.
4. Click the File item again, select Export As and proceed to picking video quality, file name and directory to save the rotated video.